Move your WhatsApp number to Ohanvi
Bring your WhatsApp Business number, contacts and chat history from another WhatsApp platform into Ohanvi. At the end, your number sends from Ohanvi, your contacts and past chats are imported, and a test reply shows up in the inbox.
Before you start
- Your role can open Migrate to Ohanvi. It is an admin screen. See Manage team members, roles and permissions.
- You can sign in to your old provider's dashboard, and to Facebook as your Meta Business Manager admin.
- You have exported, or can export, your contacts and chat history from the old provider.
Steps
Open the migration guide
- Click your initials in the bottom-left corner, then click Settings.
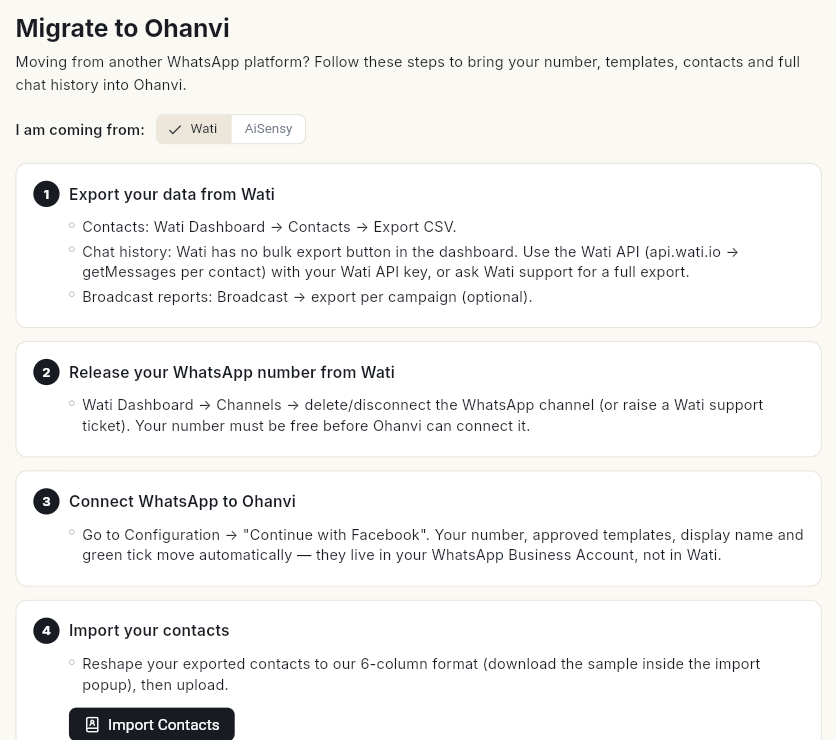
- Select WhatsApp, then Migrate to Ohanvi. The screen lists 6 steps.
-
Next to I am coming from:, pick your current platform, Wati or AiSensy. The steps change to match it.
What moves on its own
Your number, approved templates, display name and green tick belong to your WhatsApp Business Account, not to the old provider. They move when you connect the number. Contacts and chat history live on the old provider's servers, so you import them. Campaigns, analytics and bot flows cannot be migrated. Recreate them in Ohanvi.
Move the number
- Export your data from the old platform. Export contacts as a CSV. For chat history, follow the note on the screen for your platform. Some platforms need a support request.
- Release your WhatsApp number from the old platform. Delete or disconnect the WhatsApp channel there, or ask their support to release it.
- Connect WhatsApp to Ohanvi. Go to Configuration and use Continue with Facebook. See Connect your WhatsApp number.
Release the number first
The number must be free before Ohanvi can connect it. Until the old platform releases it, the connection fails.
Import contacts and chat history
- Reshape your contacts file to the 6-column format: Phone Number, First Name, Last Name, Email, Country Code, Tags.
- Under Import your contacts, click Import Contacts. The WhatsApp Contacts upload opens. Download the sample CSV there if you need a template.
- Upload your file. Only .xlsx, .xls and .csv files are accepted.
- Reshape your chat export to these columns: Phone Number, Sender Name, Direction, Message Type, Message Text, Timestamp. Use incoming or outgoing for Direction.
- Under Import your chat history, click Import Chat History, then upload the file.
Contacts missing from your list are created from the chat file. Uploading the same file again is safe: duplicates are skipped.
Check everything works
- Send a test message from Ohanvi to your own phone.
- Reply from your phone.
- Open WhatsApp in the left rail, then select Inbox. Check that your reply appears.
Video walkthrough
[VIDEO]
Troubleshooting
| Issue | Cause | Fix |
|---|---|---|
| Connecting the number fails in the Facebook popup | The old platform still holds the number. | Finish step 2: release the number, then connect again. |
| Only .xlsx, .xls, .csv files are allowed | The file is in another format. | Save it as CSV or Excel, then upload again. |
| Templates are missing after the move | Templates stay with the WhatsApp Business Account you connected. | Check you connected the same WhatsApp Business Account, not a new one. |
| Old bot flows and campaigns are missing | These cannot be migrated. | Rebuild them in Ohanvi. See Create a WhatsApp chatbot flow. |