Manage WhatsApp contacts
Build your WhatsApp audience and keep its consent up to date. At the end of this page you can add or import contacts, group and tag them, opt contacts in or out, and set the extra words customers can send to stop your messages.
Before you start
- You can see Contact in the WhatsApp panel. If not, ask your admin. See Manage team members, roles and permissions.
- To import, you have a CSV or Excel file with a phone number column.
- For CRM contact records, deals and activities, see the CRM overview.
Steps
Open your contacts
- Open WhatsApp in the left rail, then select Contact. The Contacts screen opens.
-
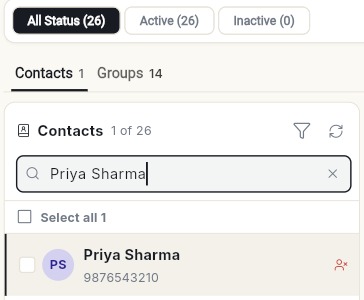
The top row filters by status: All Status, Active and Inactive, each with its count. Below it, the Contacts and Groups tabs show how many of each you have.
-
Type in Search name, phone or email… to find someone. Click a row to see the contact on the right, in the sections Identity, Messaging, Custom Attributes, Activity and Record.
Add a contact
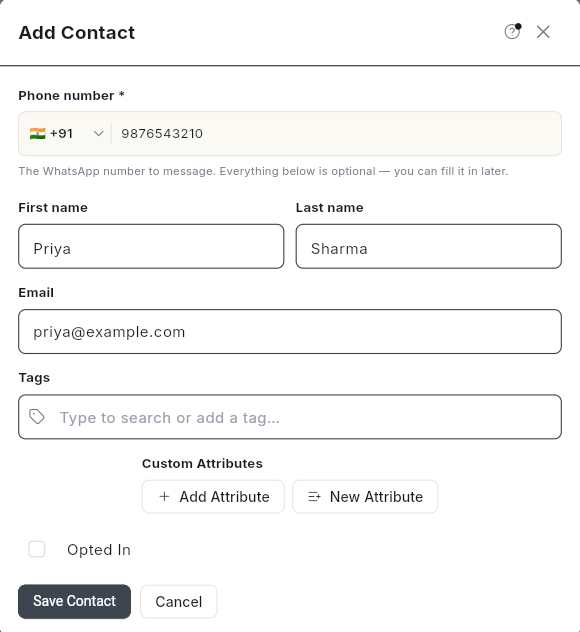
- Click Add contact at the top right. Add Contact opens.
- In Phone number *, pick the country and type the number. Everything else is optional.
- Fill in First name, Last name and Email if you have them. You can also add Tags and Custom Attributes.
-
Tick Opted In only if the person agreed to get your messages. It is off by default.
-
Click Save Contact. The contact is added to the list. Search for the name to find it.
Import contacts
-
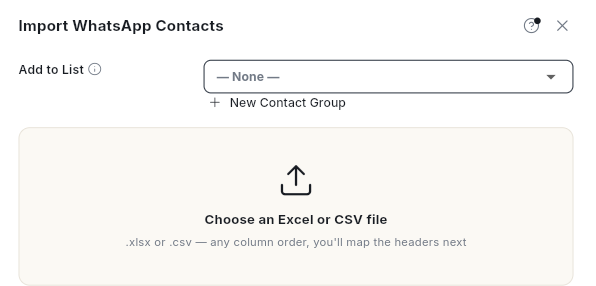
Click the Import (upload) icon at the top right. Import WhatsApp Contacts opens.
-
In Add to List at the top, pick a contact group, or leave — None — to use the Business Contact group. Click New Contact Group to make a new one.
- Click Download Sample CSV if you need a template.
- Click Choose an Excel or CSV file and pick your file. It can be
.xlsxor.csv, with the columns in any order. - Under Header identifiers, pick the column in your file for each field, such as Phone Number and First Name.
- Under Options, set Default Country Code for numbers without one. Turn on Replace Tags to replace existing tags with the file's tags.
- Click Import. Import complete appears when it finishes.
A phone number that already exists is merged into that contact. Rows without a phone number are skipped. Click Import history to see past imports.
To import and send a campaign straight away, choose Import and broadcast instead.
Import contacts and broadcast to them
Use this when you want to message the people in the file straight away. It is the same file import, but a contact group is required.
- Click Actions at the top, then Import and Broadcast. You can also right-click the Import icon and choose Import and broadcast. Import WhatsApp Contacts opens.
- In Add to List, pick a contact group. The help text reads The contact group these contacts will be broadcast to. There is no — None — option here.
- Click New Contact Group if the group does not exist yet.
- Click Choose an Excel or CSV file and pick your file.
- Pick the column for each field under Header identifiers, as in Import contacts above.
- Click Import. Import complete appears when it finishes.
- Read the message Contacts imported — pick that group in the Audience step to broadcast to them. The Campaign compose screen opens.
- In the Audience step, pick the group you chose in step 2. Then continue as in Send a WhatsApp broadcast campaign.
Check opt-in first
Only message people who agreed to hear from you. See Opt contacts in or out below.
Read the import history
- Click Actions at the top, then Import History. You can also right-click the Import icon and choose Import history. The Import History window opens.
- Read the list, newest first. Each row shows Date, Status, Total, Imported, Failed and Details.
- Check Failed. A number above 0 shows in red. Details says why those rows failed, or shows — when nothing failed.
- Click the close icon when you are done.
The window lists contact file imports only. When there are none, it reads No imports yet.
Group and tag contacts
-
Tick the contacts you want. A dark bar appears with Add tag, Add to group, Send broadcast and Export for the selection.

-
Click Add to group. Add to contact group opens. Pick a group in Contact Group, or click New Contact Group, then click Confirm.
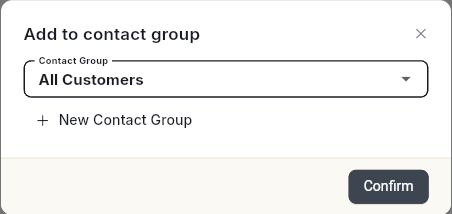
To take a contact out of a group, click the contact, then click Remove… next to Groups on the right. The message Removed 1 contact from "All Customers". appears, with your group's name.
-
Click Tags, type in Type to search or add a tag…, then click Add Tags.
To create or edit groups, click Contact Groups, or open the Groups tab. Groups are shared with CRM. See Create and manage contact groups.
Opt contacts in or out
Opted-out contacts cannot receive any WhatsApp message from you until they opt back in.
For one contact:
- Click the contact. The details open on the right.
- Under Messaging, switch Opted in on or off. It shows Can receive campaigns or Campaigns will skip this contact.
- Click Save.
For many contacts:
- Tick the contacts.
- Click Block & opt. Opt in/out opens.
- Click Opt Out or Opt In.
Every change is recorded in the contact's Consent History, with its source, such as a STOP/START keyword, a manual change or an import.
Set opt-out and opt-in words
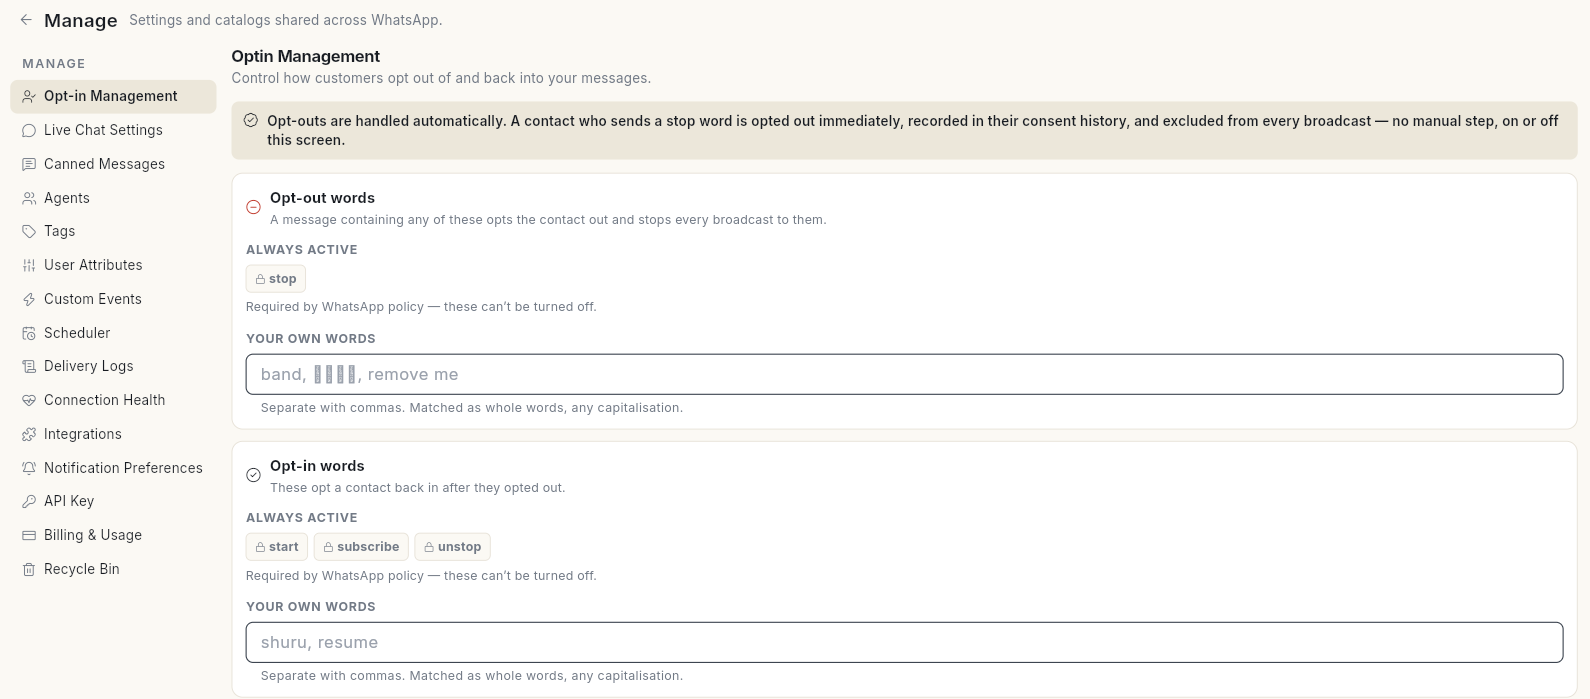
A customer who sends stop is opted out at once and left out of every broadcast. Sending start, subscribe or unstop opts them back in. These words are always active and cannot be turned off.
- Open WhatsApp in the left rail, then select Manage.
-
Select Opt-in Management.
-
Under Opt-out words, type your own words in Your own words, separated with commas. For example, words in your customers' language. They match whole words in any capitalisation.
- Under Opt-in words, add words that opt a contact back in.
- Under Confirmation replies, edit After opting out and After opting back in. Leave them empty to use the standard wording.
- Click Save changes. The message Opt-in settings saved. appears.
Video walkthrough
[VIDEO]
Troubleshooting
| Issue | Cause | Fix |
|---|---|---|
| No importable rows found — check the Phone Number column mapping. | No column was mapped to Phone Number, or it is empty. | Under Header identifiers, pick the right column for Phone Number. |
| Could not update opt-in status — try again. | The change did not save. | Try again. If it keeps failing, refresh the page. |
| A contact shows Needs attention — invalid number | The last 3 broadcasts to them all failed, and none ever reached them. | Check the number is on WhatsApp. Click Stop sending or Keep sending. |
| A contact shows Needs attention — possibly blocked | They received messages before, but recent sends keep failing. WhatsApp never confirms a block. | Review, then click Stop sending or Keep sending. |
| A customer who sent stop still appears | Opt-out stops messages, it does not delete the contact. | This is expected. Their status shows Opted out. |